|
Fine Dining Server Resume Template |
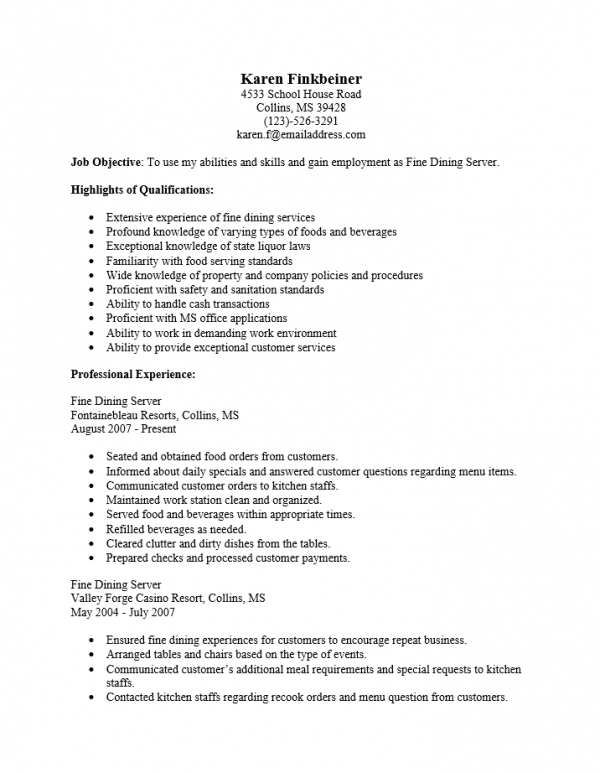
The Fine Dining Server Resume Template provides formatted headings for servers focused on gaining an interview in an upscale establishment. The fine dining industry is one of the most formal industries one can seek a position in. Candidates will be expected to know the different types of dining experience (American, Butler, French, Russian, etc.) and be fully familiar with proper etiquette and serving techniques. When a candidate develops a resume as a fine dining server they must be able to demonstrate a knowledge of fine dining procedures and at least some experience.
When filling out this resume template, make sure you have enough time to focus. Furthermore make sure you are in a proper frame of mind and have a command of the appropriate technical jargon. While buzzwords that enhance a resume are welcome, one should make sure not to overuse them and bombard a recruiter with useless words or information. Make sure you follow the directions of the ad on how to submit an inquiry and address as many of the requirements listed as possible. A fine dining server resume must look polished, denote professionalism, and be timely in its delivery.
How to Write
Step 1. The first few lines of this template should contain your full name and contact information. There are one or two things of note here. The first is that you name should stand out. Thus try adding an effect such as placing it in bold letters, enlarging the font or both. Keep it professional and aesthetically pleasing. Another is in terms of formatting, while it is generally considered standard to have it this information in the center there is some freedom. For example, it may be aligned to the left if the resume’s headings are also aligned to the left.
Step 2. The “Objective” section is the first section on this resume template which will require well thought out information. This is a resume’s introduction. It is a place where the candidate states his or her intention to attain the position he or she is applying for. This may be followed by some statements highlighting what the candidate brings to the table. These should be roughly one to four brief statements. It is a good idea to mention the name of the company or recruiter in this section. Hint: Fill out the content of this section last as your resume should support whatever is written in it.
Step 3. The “Highlights of Qualifications” is where an applicant can really show what they are capable of in professional terms. If this sections seems difficult to compose, revisit the ad you are answering and read it carefully. Make note of the requirements for the job. Then, compose a list of your skills and knowledge as they relate to those requirements. Place this list under the heading and keep it in a bullet format.
Step 4. The “Professional Experience” section is where a job seeker lets potential employers know where they worked, for how long, and what they did there. It is customary to list your official job title, company name, and dates worked for each previous employer. Follow this with a brief description of your time there. This list should be in reverse chronological order. That is, the most recent employer dates at the top and the oldest at the bottom.
Step 5. The “Education” section is where you list your academic credentials. This should deliver similar information about your academic history as done regarding your employment history in the above section. List the degree title you earned, where you earned it and when it was awarded. If there is any particularly impressive or relevant information regarding this, include it below this information (this is optional).


