|
Chronological Resume Template |
The Chronological Resume Template is a classic format which serves to give employers one’s job history in a timeline format. That is, the work experience section will list the oldest position you held first and the most recent last. While this format was popular for the most part of the twentieth century it was given up for the reverse chronological resume. Nonetheless, some recruiters will specifically ask for a chronological resume. As anyone will tell you, it is not enough to simply submit information required by a hiring manager, one must submit it in the way a recruiter requests. An unconventional request should be answered appropriately as it is also an indication of an applicant’s ability to follow instruction.
The career history section (“Experience”) should be written in a STAR format (Situation, Tasks, Actions, Results), however if this is not applicable one can simply list the actual duties performed. Additionally, all sections should be easy to read and in a standard font (i.e. Arial, Times Roman Numeral, etc.) This is particularly important since an applicant would not want a recruiter who must plow through a plethora of responses to have any difficulty printing his or her resume. Keep in mind that while resumes should aim to present all the information necessary on one page, this is not always the case and one should bear certain considerations in mind when going beyond a page. If a recruiter requests a chronological resume format then it is likely they will expect the name and contact information to be on every page should the document be two or three pages in length. This may especially apply to one with a wealth of experience. Regardless of an applicant’s experience level, applicants should take the time compose and provide a crisp professional resume that is appropriately worded in a timely manner. Such document will gain the attention of a hiring entity and heighten the possibility of attaining an in-person interview.
How to Write
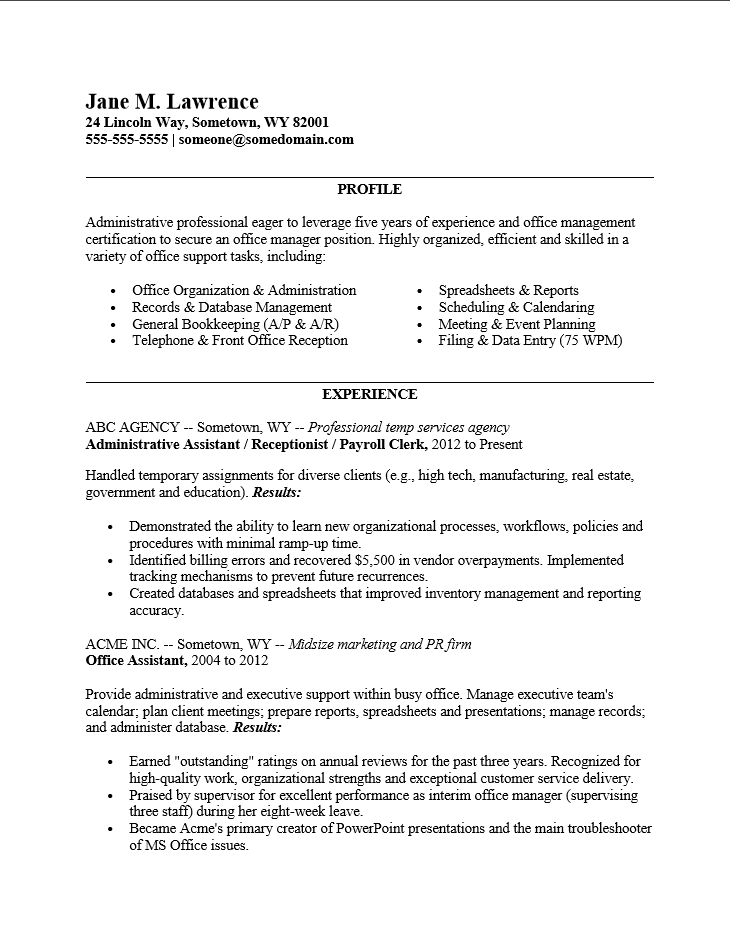
Step 1. Type your name and contact information at the top of the page. Your name should be prominent. Use your full name and up to date contact information.
Step 2. The Objective Section: Boldly state your intention to acquire the position you are applying for and include a reason why you should be hired. This can be in the form of two to four smartly written statements or one to two statements with a bullet list highlighting your skills and experience.
Step 3. The Experience Section: This is your employment history. In a straightforward chronological resume, this should be a list of your previous positions with the oldest first and the most recent last. Each entry should contain the name of the company and its location. The type of company is optional. The next line is the position title you held and the date range you held it for. This should be followed by a synopsis of your duties and accomplishments there.
Step 4. The Education Section: Enter the school you went to, the degree or certificate you earned, and the date you attended. If there is any relevant coursework or if you gained notoriety, enter this as well. This can be in the form of a bullet list or in the form of statements but must remain professional looking and easy to read.
Step 5. The Computer Skills Section: Enter the software programs you know here. If you do not have a wealth of experience with a variety of software, this may be done in a bullet list.